All posts by Steven T. Snyder

Autocrossing the DOHC V6 ’88 Fiero – Part 2

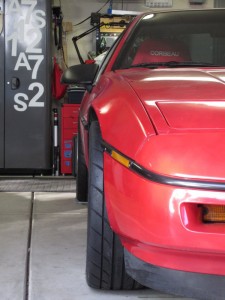
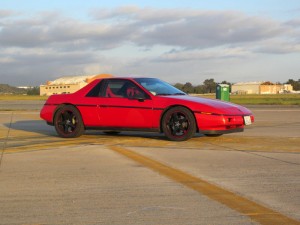
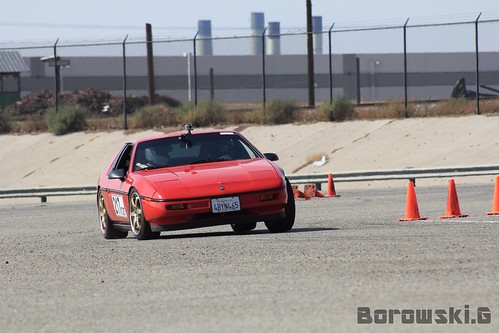
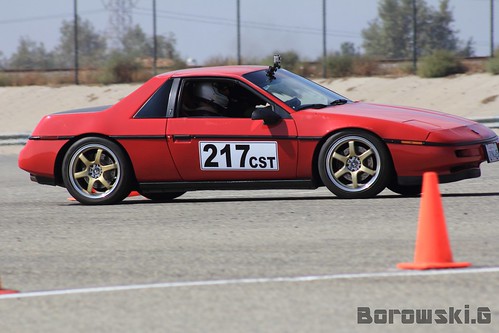
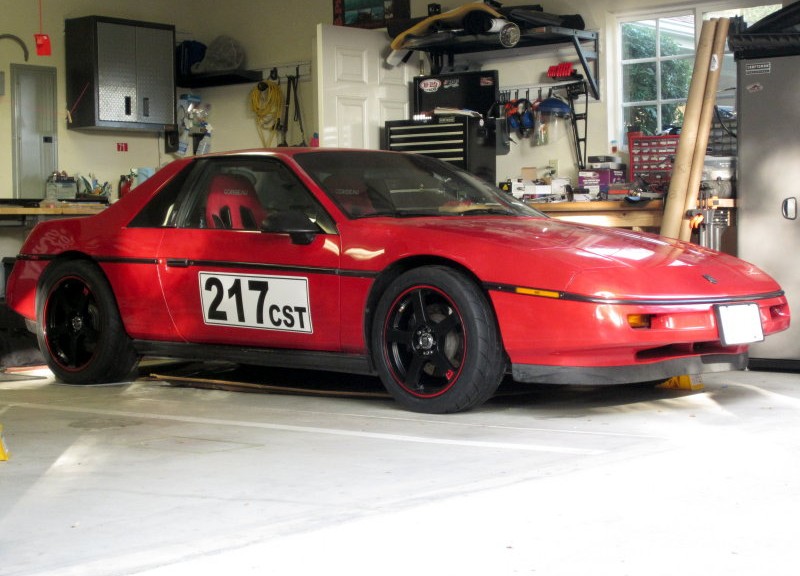
I previously wrote about my first experience autocrossing my DOHC V6 Fiero. On March 9th and 10th I participated in the Evolution Performance Driving School Phase 1 and Phase 2 courses. It was my first outing since making a significant number of changes to the car to fix the oversteer problems that I encountered the first time.

Notable changes since last time include:

  • 400-lb/in front springs
  • Fieroguru’s lateral link relocation brackets
  • New alignment
  • Revised lateral link lengths
  • New exhaust system
  • New clutch, new steel flywheel (I had continual problems with the aluminum one loosening up)

I also weighed the car (see below).

Setup

Tires/Wheels

  • Front: 17×7 (48mm offset) Motegi MR116, 215/45/17 Hankook RS3
  • Rear: 18×9 (45mm offset) Motegi MR116, 275/35/18 Hankook RS3

Alignment & Ride Height

  • Front toe in: 0
  • Front camber: -1.1 deg
  • Front caster: Mechanical maximum (I didn’t measure)
  • Rear left camber: -1.8 deg
  • Rear right camber: -2.3 deg
  • Rear toe in: 0
  • Front ride height: 13.9 inches (fender arch to wheel center)
  • Rear ride height: 14.6 inches (fender arch to wheel center)

Weight (NEW!)

All weights are in pounds.

Without driver With 140-lb driver
Total 2779 2920
Left Front 604 655
Right Front 579 595
Left rear 780 833
Right rear 816 837
Cross 48.9% 48.9%
Left 49.8% 51%
Right 50.2% 49%

Shocks/Springs/Bushings/Etc

  • Front springs: West Coast Fiero 400 lb-in with ~1/2 coil removed
  • Front shocks: Koni Red, adjusted somewhere in the middle
  • Front swaybar: Stock, with Rodney Dickman’s solid endlinks
  • Front bushings: Polyurethane everywhere except the swaybar mounts are stock
  • Rear springs: 350 lb QA1
  • Rear struts: Koni reds, adjusted somewhere in the middle, flipped strut top mounts for more compression travel
  • Rear swaybar: None
  • Rear bushings: Poly on the trailing links, solid rod end lateral links
  • Other: fieroguru lateral link relocation kit (lowers outer end of lateral and trailing links by 1.5 inches)

Weight reduction/relocation

  • Front mounted Miata battery (23 lbs), mounted behind the front crossmember
  • Corbeau A4 seats on original Fiero sliders
  • Removed jack, wrench, spare, and spare tire tray

Engine

  • Balanced and blueprinted 1993 3.4 DOHC V6, modified short runner intake manifold
  • 220whp on the Dynapack at Church Automotive

Transmission

  • Fiero Getrag case with later Getrag 282 internals (slighter shorter 5th gear, larger and stronger diff)
  • Clutchnet organic/clutchtex disc and “yellow” pressure plate with stock steel flywheel

Exhaust

  • Stock exhaust manifolds and crossover, 2.5″ cat, Magnaflow 2.5″ single-inlet dual-outlet muffler, resonated tips

Brakes

  • Slotted/drilled 12″ Corvette rotors
  • 88 Fiero calipers
  • Porterfield R4-S pads
  • OEM-style rubber brake hoses

Steering

  • 2-turns lock-to-lock power steering rack from a C4 Corvette ZR1 or Z51 package

Handling Impressions

Wow! With the new tires and suspension modifications the handling is MUCH improved. There is no more tendency to oversteer into instability when tightening up a turn, even when applying power. Yet the car does not plow. It’s VERY neutral.

The car received nothing but praise all day. Even the Evolution Performance Driving School instructors were impressed with the car’s handling. They all commented that the car didn’t have any weird habits, and was fast and fun to drive.

My run times were indicative of a massive improvement in performance. Rather than lagging seconds behind my friends’ Honda S2000 (also running Hankook RS3s), I was running neck and neck with him.

Rather than being afraid to push the car due to it’s previous tendency toward terminal oversteer, the handling now inspires confidence and feels very consistent and predictable. I felt like I could push the car to the limit of my ability.

You can check out a video of one of my runs here: https://www.youtube.com/watch?v=we8JNa_KOxk

Why it’s better

The new tire sizes slightly increase the rear grip bias. Previously, I had the tires staggered with 205s up front and 255s in the rear, giving a tire width distribution was 44.6% front / 55.4% rear. With the new 215/275 setup, the distribution is 43.9%/56.1%. Actually, the rear grip bias is even higher than that because I went to a smaller diameter tire up front and a larger one in the rear, further decreasing and increasing the size of the contact patches respectively.

The stiffer front springs increase weight transfer to the front while cornering. This is certainly a factor in the new handling of the car.

Possibly the most significant change besides the tires is the addition of the fieroguru lateral link relocation brackets. With these brackets, the two lateral links and trailing link on each side have their outer pivots moved down by 1.5″ inches.

These brackets have multiple benefits:

  • Increased roll center height (and thus less body roll)
  • Increased camber gain
  • Increased static camber

Even with my adjustable lateral links reduced in length to match the stock links, I was still able to obtain the same static camber settings in the rear as before. I could have added a bit more on the rear left to match the rear right, but I was pressed for time and didn’t want to mess with it.
I didn’t get any photos of my rear suspension in action like at the last event. However, based on the tire wear it looks like I’m no longer getting positive camber in the rear while cornering hard. Observers also noted that my car corners relatively flat, as I would have expected from the increased roll center height.

Next steps

Now that I have corner weights, I have enough information to have my shocks revalved, so I may do that soon. One of my front shocks is leaking, so I at least need to get it rebuilt.

I’ll plan to run the car at a few more autocrosses for more driving practice and to see how consistently it performs… then it’s on to the road course.

My friend took the car for a test drive and pointed out some high-speed handling peculiarities. After a few more autocrosses the next logical step is to get to a road course and sort those out. I currently suspect that one of the trailing links is loose or has soft bushings, causing a slight change in rear toe that’s only noticeable at highway speeds.
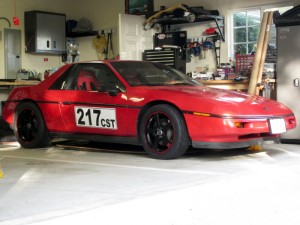
Autocrossing the DOHC V6 ’88 Fiero – Part 1

On October 13th-14th I participated in an autocross weekend with my DOHC Fiero. This was my first autocross event, but I have participated in RallyCross (in my Outback) and a track day with my old Fiero in the past.
DPP_0355

Setup

Tires/Wheels

  • Front: 17×7 (42mm offset) Raze R-74, 205/50/17 BF Goodrich gForce KDW 2
  • Rear: 17×8 (48mm offset) Raze R-74, 255/40/17 BF Goodrich gForce KDW 2

Alignment

  • Front toe in: 1/4 inch
  • Front camber: -1.6 deg
  • Front caster: Mechanical maximum (I didn’t have time to measure)
  • Rear left camber: -1.8 deg (as much as I could get; the wheel is about to hit the knuckle. I need 18s)
  • Rear right camber: -2.5 deg
  • Rear toe in: 1/16 inch

Shocks/Springs/Bushings

  • Front springs: Stock with 1 coil removed
  • Front shocks: Koni Red, adjusted somewhere in the middle
  • Front swaybar: Stock, with Rodney Dickman’s solid endlinks
  • Front bushings: Polyurethane everywhere except the swaybar mounts are stock
  • Rear springs: 350 lb QA1
  • Rear struts: Koni reds, adjusted somewhere in the middle, flipped strut top mounts for more compression travel
  • Rear swaybar: None
  • Rear bushings: Poly on the trailing links, solid rod end lateral links

Weight reduction/relocation

  • Front mounted Miata battery (23 lbs), mounted behind the front crossmember
  • Corbeau A4 seats on original Fiero sliders
  • Removed jack, wrench, spare, and spare tire tray

Engine

  • Balanced and blueprinted 1993 3.4 DOHC V6, custom intake, 220whp on the Dynapack at Church Automotive

Transmission

  • Fiero Getrag case with later Getrag 282 internals (slighter shorter 5th gear, larger and stronger diff)
  • Clutchnet kevlar clutch, Luk pressure plate

Exhaust

  • Stock exhaust manifolds and crossover, 2.5″ cat, custom 2.5″ single inlet, dual outlet muffler

Brakes

  • Slotted/drilled 12″ Corvette rotors
  • 88 Fiero calipers
  • Porterfield R4-S pads
  • OEM-style rubber brake hoses

Steering

  • 2-turns lock-to-lock power steering rack from a C4 Corvette ZR1 or Z51 package

Initial driving impressions

  • Fiero Getrag gearing is not ideal
  • Easy to put power down
  • The super fast ratio ZR1 steering rack is awesome
  • Brakes could use more rear bias

Power/Gearing

The gear ratios really break the car for autocross. I can go full throttle in second gear when going straight or mostly straight and not loose traction, nor hit the rev limiter, so it needs to be shorter. First gear is only usable for the launch, and the beginning of the course until it opens up. After shifting into 2nd, there aren’t any spots where a downshift (and subsequent upshift back to 2nd) are practical, it scrubs off too much time. I think a Northstar in 2nd gear with a 7k RPM limit would be just right, or a turbocharged 3.4 DOHC with a fast spooling turbo and low boost.

With my motor, the Getrag gears with the shorter 2nd would probably be a lot better. I hated the 2nd to 3rd shift with those gears when I ran them though.

Fortunately (or unfortunately) I can’t drive the car well enough to take too much advantage of the extra speed a shorter 2nd would give me, so it’s not a limiting factor right now.

Handling

The fast ratio steering is amazing. It’s VERY easy to point the car where it needs to go, on even the tightest hairpins. I didn’t have any problems with steering feedback. I can still feel the loss in self-aligning torque when approaching the lockup point during threshold braking.

Speaking of braking, it seems the fronts lock up pretty easily. I feel like the car should be able to stop faster. I think it needs more rear brake bias.

My car tends toward oversteer; if I turn in hard enough it spins out. I can countersteer and recover almost every time, but it scrubs off a LOT of speed when it happens. It’s annoying trying to find the traction limit in a turn only to have the rear step out and then lose all your speed. This is the only serious handling problem I experienced.

Performance

Hard to say. I don’t really have enough driving ability to know how fast the car will run compared to others, and the oversteer problem made it hard to find the limit of the car. My buddy running an AP2 S2000 with lots of suspension mods but stock tire sizes and motor ran about a 2nd faster than me. Both of us are novice autocrossers. Even if I could drive it well, it’s hard to compare right now since I have [i]four year old[/i] tires, and almost every other cars in my class (with the exception of my friend’s S2000) is running RS3s or Z1s. That will change soon if I decide to continue developing this car.

Photos

Click the images for bigger versions.

DPP_0355

DPP_0357

DPP_0441

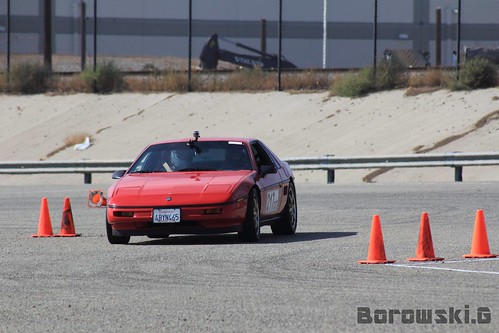
I’m running -2.5 deg of camber on the rear right, but you can from the photos that it still goes into positive camber due to body roll. Look at how much the inside is lifting! There’s a lot of roll. I am not currently running a rear swaybar. I was running the factory rear swaybar for some time, but the rear end felt very loose.. probably from shifting too much weight transfer toward the rear to the excess roll stiffness vs the front. Once I get some stiffer springs up front I may consider trying the rear swaybar again.

Reading a Dymo USB scale using Python

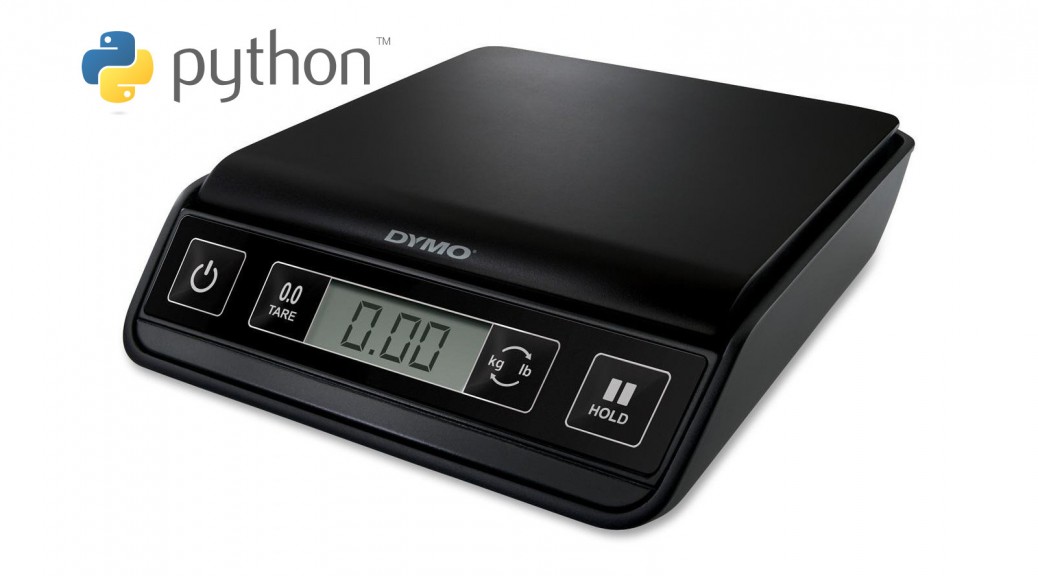
For an experimental project I’m working on, I wanted to read the weight from a  DYMO M10 digital postal scale with USB support. I expected the scale to show up as a virtual COM port, since older digital scales used RS232 for their computer interface,but the scale shows up as a USB HID (Human Interface Device) in Windows.

I found Micah Carrick’s site which shows how to read from a MagTek credit card reader in Linux using PyUSB 1.0. Like the DYMO M10, the MagTek reader uses the USB HID device class so the basic method for getting data from the device is the same.

The first step is to install PyUSB 1.0. Unzip the contents of the archive from the PyUSB sourceforge page and run python setup.py install.

Using PyUSB on Windows requires installing a suitable backend such as libusb-win32. After installing libusb-win32, it’s necessary to install a device filter for the scale. Connect the USB scale to the computer and press the power button. Windows should detect the scale and install the device driver automatically. The DYMO M10 shows up in Device Manager as a “USB Input Device” with vendor ID 0922 and product ID 8003.

Using the libusb-win32 Filter Wizard, install a device filter for the scale. It will show up in the list as “vid:0922 pid:8003 rev:0100 USB Input Device”.

Now it’s possible to read data from the scale using the usb module in Python:

import usb.core
import usb.util

VENDOR_ID = 0x0922
PRODUCT_ID = 0x8003

# find the USB device
device = usb.core.find(idVendor=VENDOR_ID,
                       idProduct=PRODUCT_ID)

# use the first/default configuration
device.set_configuration()
# first endpoint
endpoint = device[0][(0,0)][0]

# read a data packet
attempts = 10
data = None
while data is None and attempts > 0:
    try:
        data = device.read(endpoint.bEndpointAddress,
                           endpoint.wMaxPacketSize)
    except usb.core.USBError as e:
        data = None
        if e.args == ('Operation timed out',):
            attempts -= 1
            continue

print data

The data packet is a 6-element array; for example:

array('B', [3, 2, 11, 255, 0, 0])

The 1st element has always had the value 3 in my tests, so I’m not sure what it does.

The 2nd element indicates whether the value is stable.

The 3rd element (value 11 in the example above) is probably a flag byte. The only values I have observed so far are 2 and 11. A value of 2 indicates that the scale is in kg mode, and a value of 11 indicates that the scale is in lbs/ounces mode. Curiously, whenever the scale reads 0, it seems to indicate lbs/oz mode.

Thanks to Daniel Rice (see his comment below), we now know what the 4th element (index 3) is for; it’s for calculating the scaling factor when reading in ounces. In the above example it has a value of 255. This is in fact the signed value -1, which indicates that the raw value is in tenths, due to a scaling factor of 10^-1 or 0.1. For a value of 254, the scaling factor is 10^-2, or 0.01. I’ll refer to this value as scaling_factor below.

The elements at indices 4 and 5 are used to calculate the weight.

In kg mode:

grams = data[4] + (256 * data[5])

In pounds/ounces mode:

ounces = scaling_factor * (data[4] + (256 * data[5]))

If you check the mode, you can just convert to whatever unit you need no matter what mode the scale is in.

DATA_MODE_GRAMS = 2
DATA_MODE_OUNCES = 11

raw_weight = data[4] + data[5] * 256

if data[2] == DATA_MODE_OUNCES:
    ounces = raw_weight * scaling_factor
    weight = "%s oz" % ounces
elif data[2] == DATA_MODE_GRAMS:
    grams = raw_weight
    weight = "%s g" % grams

print weight

The scale is capable of reading negative values if you zero it and then remove the weight, but I haven’t yet figured out how to get negative weight values yet. The scale itself displays the correct value, but the data packet reads as if it were zero, except the second array element has a value of 5 instead of 2.

I also haven’t figured out how to determine when the reading has stabilized. Nicholas Piasecki’s article on reading a Stamps.com USB scale in C# says that the 2nd element in that scale’s data packet reads 4 when the value is stable, but 4 is all I observe when reading a positive non-zero weight value, even when the values are changing rapidly.

I hope this information has been useful to you. If you have any questions or have anything to add, please post a comment!